
In Step 2, you narrowed down your list of potential suppliers. Now it’s time to see what they can actually deliver.
Before placing a large order, you should request product samples and check whether they meet your requirements. This is especially important for customized products, where small differences in materials, components, or design can affect the final result.
Once everything is confirmed, you’ll need to approve a Pre-Production Sample (PPS). This will serve as a reference for mass production and future quality checks.
In this step, we’ll walk you through how to request samples, compare their quality, make revisions, and approve the final version.
1. Request Samples From Shortlisted Suppliers
Start by requesting samples from a few suppliers that passed your initial screening in Step 2.
If you’re sourcing an existing product, you can usually ask for a standard sample to check its appearance, materials, and functionality.
For customized products, the process may take longer. The manufacturer may need to adjust the design, change certain components, or create new tooling.
Before ordering samples, confirm the following details with each supplier:
- Sample cost: How much will each sample cost?
- Shipping cost: Who pays for delivery?
- Lead time: How long will it take to prepare the sample?
- Specifications: Will the sample follow your product requirements?
- Customization: Which changes can the supplier make?
- Revision costs: Will you need to pay extra if adjustments are required?
Try to provide the same product specifications to each supplier. This makes it easier to compare their samples later.
For highly customized products, you can first evaluate existing samples from several suppliers. Then work with your preferred supplier to develop the final pre-production sample.
2. Compare Supplier Samples
Once the samples arrive, examine them carefully.
Appearance matters, but there is more to check. Two products may look almost identical while using different materials or internal components.
Pay attention to the following:
- Appearance: Color, shape, finish, and overall workmanship.
- Materials: Whether the materials match your specifications.
- Components: Quality and suitability of the main parts.
- Functionality: Whether the product works as expected.
- Dimensions: Whether the size and measurements are correct.
- Packaging: Whether the packaging meets your requirements.
You should also compare the samples with their quoted prices. A higher price should come with a clear reason, such as better materials, stronger performance, or more suitable components.
Real Case Study: Comparing T8 LED Tube Samples
Let’s look at an example from our sourcing experience.
We collected T8 LED tube samples from three different suppliers. Although the products had similar external specifications, we found several differences after examining their internal components.
For example, the samples used different numbers of LEDs:
| Comparison | Supplier A | Supplier B | Supplier C |
| Photos | 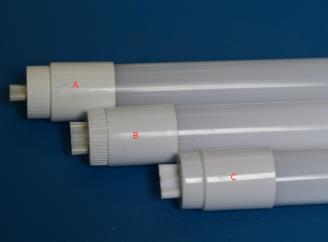 | 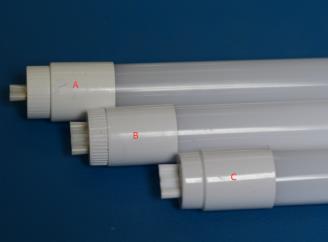 | 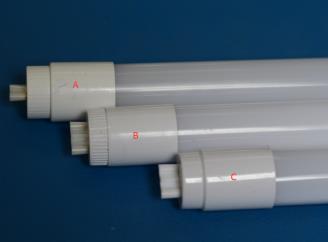 |
| End Plug Component | 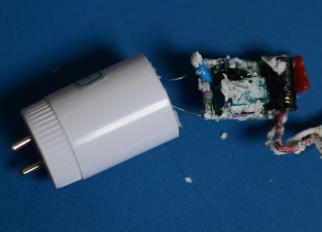 | 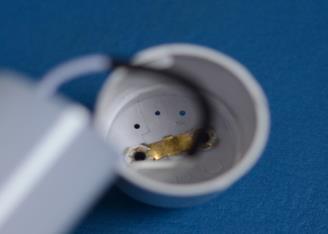 | 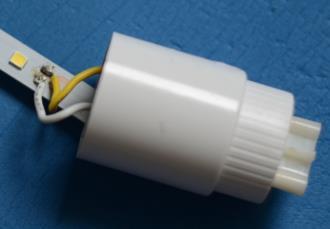 |
| Conclusion | ★★★ One end power supply | ★★ Two end power supply | ★★★ One end power supply |
| LED | 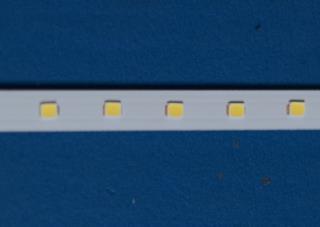 |  | 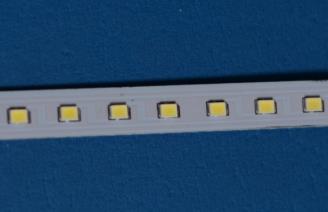 |
| Conclusion | ★★ Total 88 LEDs, LED from Chinese manufacture | ★★★ Total 168 LEDs, from Taiwan Osram | ★★★ Total 120LEDs, from Chinese Sanan |
| Power Supplier Chip | 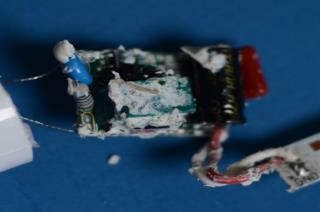 | 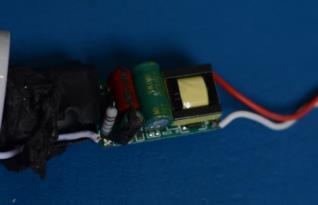 | 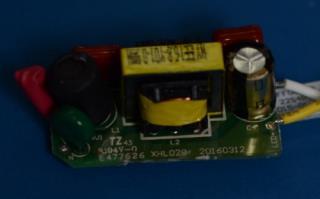 |
| Conclusion | ★★ Fix in the end plug with foam glue | ★★★ Protect with black foam tape | ★★★ Fix in the end plug |
| LED Base | 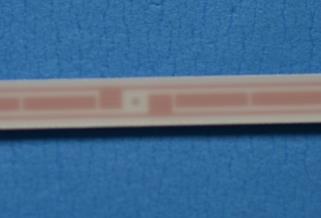 | 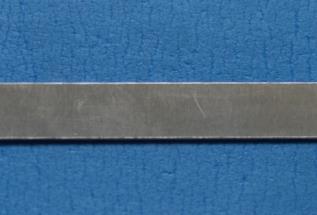 | 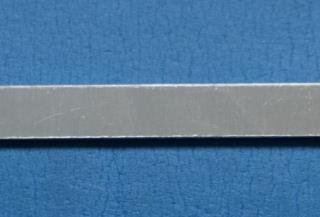 |
| Conclusion | ★★ PCB LED base is not a good enough choice | ★★★ An alumni LED base is good for releasing heat | ★★★ An alumni LED base is good for releasing heat |
The LED count alone doesn’t determine product quality. The components need to be evaluated against the product’s performance, safety, and design requirements.
In this case, examining the internal parts helped us understand why the three samples differed.
When comparing your own samples, ask the supplier about any differences you find. Check whether the materials and components meet your specifications before deciding which product to develop further.
3. Build a Sample Specification Sheet
Once you’ve compared the samples, it’s time to confirm the details with your chosen supplier.
You already prepared a product specification sheet in Step 1. Now, update it based on the sample you’ve selected and any changes you’ve agreed on with the manufacturer.
Your sample specification sheet should include:
- Dimensions: Size, weight, and acceptable measurement differences.
- Materials: The exact materials and components to be used.
- Appearance: Colors, finishes, patterns, and other visual details.
- Functionality: What the product should do and how it should perform.
- Customization: Logo placement, printing methods, and other custom features.
- Packaging: Packaging materials, labels, inserts, and carton requirements.
- Reference images: Photos or drawings showing the expected result.
Be specific when describing your requirements.
For example, instead of writing “blue packaging,” provide a color reference or Pantone code. If a particular component is important, include its model number or technical specifications.
Share the updated sheet with your supplier and ask them to confirm the details.
Keep a record of any changes made during sample development. This will help both sides work from the same requirements when preparing the final pre-production sample.
4. Put Key Development Terms in Writing
Custom sample development may involve design work, new moulds, special materials, or several rounds of revisions.
Before development begins, agree on the costs, responsibilities, and terms with your supplier.
Here are a few important points to cover.
Mould Ownership
If your product requires a custom mould, agree on who will own it before paying the tooling fee.
Your agreement should also cover where the mould will be stored, who can use it, who pays for maintenance, and whether you can transfer it to another manufacturer.
Having these details in writing can prevent disputes if you change suppliers later.
Design and Intellectual Property Protection
If you’re developing a custom product, you may need to share original designs, drawings, logos, or packaging files with the manufacturer.
Make sure your agreement clearly states who owns these materials and how the supplier is allowed to use them.
For sensitive designs, consider a written confidentiality agreement that covers how your information can be used and shared.
3. Sample Costs and Payment Terms
Confirm the total sample cost before development starts.
Ask whether the quotation includes materials, customization, tooling, and delivery. Also, find out how much additional revisions will cost.
Agree on the payment schedule and any conditions for refunds or credits toward future bulk orders.
Development Timeline and Revisions
Set a clear deadline for the first sample.
You should also agree on how revisions will be handled if the sample fails to meet your specifications.
For example, clarify who will cover the cost of correcting mistakes and how long each revision is expected to take.
What Happens if Development Fails?
Sometimes, a supplier cannot produce a sample that meets your requirements, even after several revisions.
Agree in advance on what happens in this situation.
Your written terms can cover cancellation, refunds, ownership of completed design work, and the return of any tooling or materials you’ve paid for.
Clear agreements make it easier to resolve problems and keep the project moving.
5. Revise the Sample Until It Meets Your Requirements
Your first sample may need a few adjustments before it’s ready for production.
Perhaps the color is slightly off, the packaging feels too thin, or a component doesn’t work as expected. Whatever the issue, give your supplier clear feedback so they know exactly what needs to change.
Give Clear Feedback
Be specific about the problems you find.
For example, instead of saying “The packaging looks cheap,” you could say:
Please use thicker cardboard for the packaging and change the surface finish from glossy to matte.
Photos and videos can also help. If a product has several problems, mark each one in a photo or create a simple list of changes.
Try to send all your feedback at once. This gives the manufacturer a clearer picture of what needs to be fixed and can save time on revisions.
Review the Revised Sample
Once the supplier makes the changes, ask for an updated sample.
Check whether the problems have been fixed and whether the changes have affected other parts of the product.
For example, switching to a different material might improve the appearance but change the product’s weight or performance.
If the supplier recommends a different component or material, ask how it will affect the final product, cost, and production time.
Keep Track of Sample Versions
When several rounds of revisions are involved, it can be easy to lose track of which version contains which changes.
Give each sample a version number, such as:
- Sample V1: Initial sample
- Sample V2: Updated materials and color
- Sample V3: Final packaging adjustments
- PPS V4: Approved pre-production sample
Keep photos, feedback, and updated specifications for each version.
This way, both you and the supplier can easily identify the latest approved requirements.
6. Approve the Final Pre-Production Sample
Once you’re satisfied with the sample, you can approve it as the Pre-Production Sample (PPS).
The approved PPS serves as a reference for mass production. It shows the manufacturer what the finished product should look like and how it should perform.
Before giving your approval, check the final sample against your latest specification sheet.
Confirm the materials, dimensions, colors, components, functionality, and packaging. For products with specific safety or performance requirements, make sure the necessary tests have also been completed.
Keep a Record of Your Approval
When you approve the PPS, record the final version and share the confirmation with your supplier.
A simple approval record can look like this:
| Item | Example |
|---|---|
| Product | Custom LED Tube |
| Sample ID | PPS-001 |
| Sample Version | V3 |
| Specification Sheet | Version 3 |
| Approval Date | October 6, 2026 |
| Approved By | [Your Name] |
| Status | Approved for Mass Production |
You can confirm the approval by email or through a signed document.
For customized products, it is also helpful to keep an approved physical sample. When practical, both you and your manufacturer should retain a matching reference sample.
Keep the Approved Sample and Documents
Store the approved PPS, specification sheet, product photos, and related documents together.
Make sure the supplier uses the approved versions when preparing for mass production.
Any later changes to the product’s materials, components, design, or packaging should be documented and approved before they are used in production.
These records will also be useful when checking product quality during the next stage.
7. Final Sample Approval Checklist
Before approving your PPS, go through the following checklist.
| What to Check | Questions to Ask |
|---|---|
| Appearance | Are the color, finish, shape, and overall appearance correct? |
| Dimensions | Do the size, weight, and measurements meet your specifications? |
| Materials & Components | Are the correct materials and components being used? |
| Functionality | Does the product work as expected? |
| Customization | Are the logo, printing, and other custom features correct? |
| Packaging | Are the packaging materials, labels, inserts, and warnings correct? |
| Safety & Compliance | Have the required tests and compliance documents been checked? |
| Cost | Does the final product cost still fit your budget and expected profit margin? |
| Documentation | Does the sample match the latest specification sheet? |
For products with special requirements, you may need additional checks.
For example, an electronic product may require performance and electrical safety testing, while clothing may need checks for fabric composition, sizing, and color consistency.
Once everything meets your requirements, record your approval and keep the final PPS as a reference.
Conclusion
Developing a good pre-production sample takes time, especially when you’re creating a customized product.
Compare samples carefully, give suppliers clear feedback, and keep your specifications updated throughout the process. Before approving the final version, make sure the product meets your requirements and that both sides have agreed on the details.
With your PPS approved, you’re ready for the next stage of our Importing from China Course: Step 4 — Production & Quality Control.


One Response